
When you first save a schedule, you can choose to make the schedule Live and post it to the Web Terminal right away.
If you chose to save the schedule but not make it Live the first time:
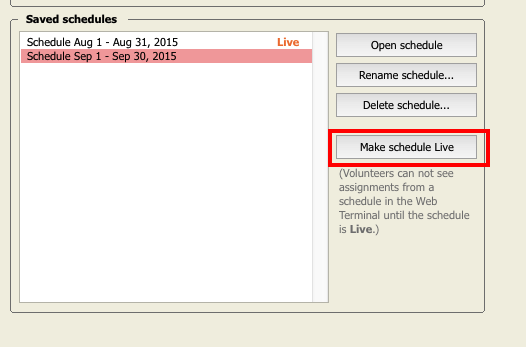
- Go to the Schedules pane in MSP
- Select the schedule you wish to make Live
- Click the "Make schedule Live" button on the right
- A window will pop-up and ask how to post the schedule online
If you have a schedule that is already live, or to create additional Live Schedule Posts, in the MSP desktop software you can create a new Live Schedule Post by:
- Opening your Live schedule
- Going to the File menu
- Selecting "Create additional Live Schedule Post..."
In the admin view of the Web Terminal, go to the Posts pane and click on the green "+" button in the upper right.